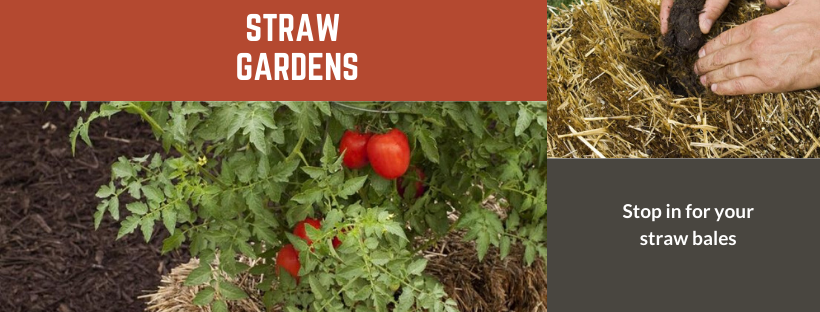
Interested in learning more about Straw Bale Gardening? Ocala Breeders Feed & Supply has you covered. We have everything you need to successfully start straw bale gardens.
Straw Bale Gardens are simply a different type of container gardening. The main difference is that the container is the straw bale itself and is held together with two or three strings. Once the straw inside the bale begins to decay the straw becomes “conditioned” compost that creates an extraordinary plant rooting environment. Getting the straw bales conditioned is an essential part of the process, and should be started two weeks prior to your target planting date wherever you are located. This gardening technique works well anywhere in the country or the world for that matter.
Who Should Plant a Straw Bale Garden
- Can’t do the heavy lifting? If you are less capable or less interested in doing the heavy work of traditional gardening, such as tilling the soil, constant weeding, unending insect battles, and persistent disease spraying, Straw Bale Gardening virtually eliminates these challenges.
- Can’t bend over? If you have a physical limitation or handicap that restricts you from getting down on the ground, you will appreciate the easier access to the higher surface of a straw bale, which eliminates the bending to plant and harvest.
- Poor soil or limited space? If you have a low soil quality, or if you have limited space that you can devote to a garden, you will love Straw Bale Gardening with its low cost, flexibility in the garden placement, and great performance of the straw once it’s properly conditioned.
- Compost Organic Matter! By the end of the season, the bale has already started to partially compose. Therefore, after the crops are harvested, the material makes a perfect top-dressing to garden beds or a valuable addition to the compost pile.
Where to put the bales
Vegetable crops need at least eight hours of sun a day. More is better. Make sure you have easy access to water, too. A wet straw bale gets quite heavy, so consider that if you are a rooftop gardener. Wooden decks can be damaged by the constant wetness.
What to grow
You can grow crops from seed or plant seedlings — just as you would in a raised bed or in the ground. For seedlings, consider tomatoes, eggplants, peppers, and spring greens. If you’re planting from seed, start with beans, cucumbers, and squash. Carrots, beets, sweet potatoes, and potatoes can be grown well but are a bit trickier.
How to prepare the bales
Before you can plant in the bales, they need some special preparation, so buy the bales at least two weeks before you want to plant. Place the bales where you want to grow; once they are prepared, they will be too heavy to move.
The first week
Water the bale thoroughly, until water runs out the bottom of the bale. Sprinkle the surface with a nitrogen fertilizer source.
Every other day, add more of the nitrogen source; water thoroughly. Do it a total of three times during the first week.
On the days you don’t apply nitrogen, just water the bales thoroughly.
The second week
For the next three days, apply the nitrogen source daily at half the original rate. Follow up with thorough watering.
After three days of adding nitrogen, water daily.
At the end of the week, sprinkle each bale with 2 cups of balanced fertilizer, such as organic 5-5-5. Water thoroughly.
Why so much nitrogen? It jump-starts the composting process and creates an ideal environment for plant roots. Over the course of the two weeks, the bales heat up considerably and can reach temperatures of 125 degrees F or more.
After the two weeks of treatment, the bales are ready for planting. The internal temperature should be about 75 to 80 degrees F, which you can verify with a compost thermometer. Probe from side of the bale, about halfway down. Low-tech option: Use your finger. The interior should feel warm, but not hot. If the bale still feels too hot, wait another couple days and check again.
How to plant
To plant seedlings — tomato, pepper, eggplant, and greens — make a gap or divot in the top of the bale and set the roots in place. Fill in around the roots with a good-quality, peat-based potting soil, ensuring that the seedlings are well-seated and level with the surface of the bale. Water gently and, if needed, add more soil to fill gaps and stabilize the seedling.
Plant no more than two tomatoes, pepper, or eggplant seedlings per bale. I’ve found that all tomato varieties — indeterminate, determinate, and dwarf — work well in bales. Success depends upon the ability to adequately support them. If you can’t provide a tall stake or fencing behind the bale, choose determinate or dwarf varieties. For other crops, use the spacing that’s recommended for the variety you choose.
To plant crops from seed, spread a 2-inch layer of moistened, peat-based potting soil on the top of the bale. Avoid bagged “topsoil,” which is too coarse for good germination and can become waterlogged. Tamp it down, make it smooth and water lightly. Plant seed at the recommended depth and spacing. Be sure to water regularly during germination.
Straw bale prepared for seedlings
Two prepared bales, top-coated with potting mix. Squash seeds will be planted here when warm weather arrives.
Stakes and supports
A good way to support tall plants, such as tomatoes, is with sturdy stakes hammered through the bale and into the ground underneath. Wire tomato cages work for medium-sized plants, such as peppers, eggplants, and compact tomatoes, but taller plants can end up a bit unstable as they become laden with the harvest and the bales soften.
When growing in straw bales, it’s worth considering compact varieties, which can be surprisingly productive. And when it comes to tomatoes, consider some of the varieties identified by the Dwarf Tomato Project.
Staking tomatoes
To support tall plants growing in bales that are placed on a hard surface, anchor sturdy stakes to the back of the bale.
SHOP FOR VEGETABLE SUPPORTS
Care and troubleshooting
Bales can dry out quickly because they are above ground and permeable. Be sure to water regularly. Drip irrigation or a soaker hose draped across the top works well.
Mushrooms growing in the bale squash seedlings with mushrooms, which are common early in the season. The harmless mushrooms can be left in place. They will disappear quickly. Similarly, regular feeding is important, because frequent watering will lead to nutrient loss more quickly. Feed your crops once a week with balanced, water-soluble plant food.
Because the bales are elevated, it helps deter certain critters, such as rabbits. I’ve found slugs to be a bit of a bother to bush beans. A sprinkling of diatomaceous earth helps with this issue.
By the end of the season, the bales will break down, the extent depends on the crops grown in them and the weather. Some hold up well enough to plant garlic in the fall. Others collapse into a rich mound of compost, perfect for adding to containers, amending garden beds, or tossing in the compost pile.
Ocala Breeders’ Feed and Supply strives to provide a knowledgeable, friendly staff that knows customers by name! Although we have grown over the years, a steadfast commitment to customer service remains. Product lines that meet the needs of our clientele make OBFS your one-stop shop for your farm and pet needs.
Stop by today and pick up all the supplies that you need to start growing successful straw bale gardens.
Sign up for our monthly newsletter and be the first to know about store specials, new products & upcoming events.
Like us on Facebook and follow us Instagram
Sources:
Home, Joel Karsten
Growing Vegetables in Straw Bales
By Craig LeHoullier
Tags: gardening, gardens, straw bale gardening